Egg in a Basket

“Egg In A Basket”

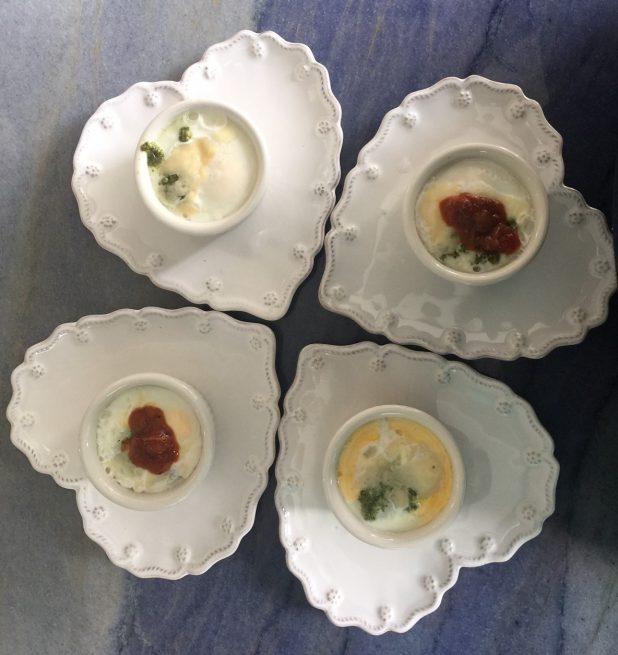
One of my really great friends came over to show me how to run my new steamer oven. She showed me this great egg recipe. Since then I have been eating my “egg in a basket” for breakfast. I love cooking for people so you know this is my go to for morning guests. I can make this in less than 10 minutes. Everyone loves the presentation of their egg but most of all they love the flavor with the pesto and cheese .

You can pop it in steamer basket, take a shower and have a great breakfast with out the fuss. Great family morning breakfast, make it for your valentine or even for Easter brunch.

Ingredients:

Four 2″ ceramic flan dishes
4 eggs
4 tsp. pesto sauce
4 tsp.  Parmesan  cheese or other cheese (cheddar)
1 Tbsp. butter
1 colander
1 pot that fits the colander with lid
Black pepper to taste

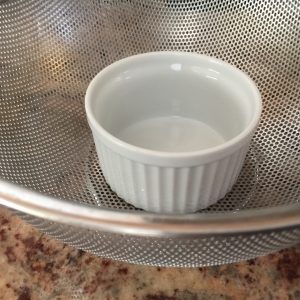
steam with collander

Begin by putting the colander in the pot and filling the bottom with 4 inches of water (enough to barely touch the colander).  Bring to a simmer. While pot is warming, start assembling your egg baskets of love.  Coat each ceramic dish with a little butter (using a paper towel) to prevent egg from sticking.  Add a layer of Parmesan cheese on bottom then add layer of pesto. Next crack the egg into the dish.  Sprinkle pepper. Top with more pesto and a little more Parmesan.

Place in the steam bath colander and cook for exactly 8.5 minutes, cover to keep the eggs slightly loose.  Steam for 9.5 minutes for medium cooked eggs.
healthy-egg-basket

7 Layer Italian Dip Recipe

7 Layer Italian Dip

 “SETTE STRATA”

7 Layer Italian Dip Recipe

Great appetizer dip for any party, especially Superbowl! Can be prepared and assembled the day before.

Pans:

9 x 12 glass for baking dish

Roasting pan to crisp beans

Ingredients:

6 oz. shredded Asiago Cheese
6 oz. shredded Parmesan Cheese
5 Tbsp. Pesto Sauce
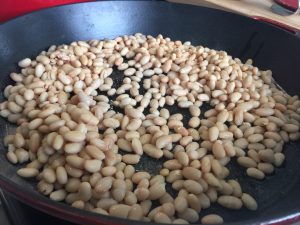
3 cans Canellini Beans (white beans)
1 cup olive oil
3 Tbsp. garlic powder
2 tsp kosher salt
½  cup Sherry or Marsala wine
1- jar Harissa Sauce
1- jar Artichoke Tapenade (Trader Joe’s)

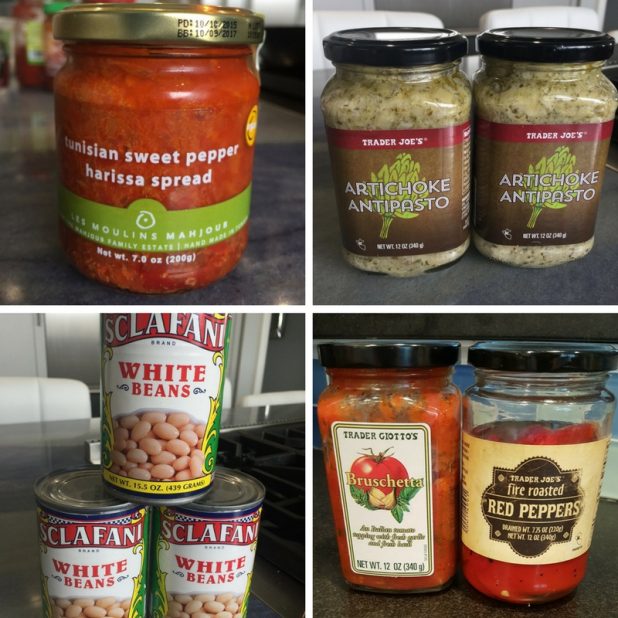
Harissa, artichoke paste, beans, bruschetta, roasted red peppers

Preparation time: 1.5 hour

Instructions:

Total baking time:  1 hour

Baked Cannelini Beans Layer

3 cans Cannelini beans or white beans – drained n rinsed
½ cup olive oil
(¼ cup olive oil bottom of roasting pan)
1 tsp. salt
1 tbsp. garlic powder

Add ¼ oil to beans and spices. Place in roasting pan and in the oven.

  Bake at 400 degrees for 30 minutes.

After 30 minutes pour another ¼ olive oil on beans and continue baking for another 30 minutes.

   *(These beans are great as a snack also. You can toss over a salad and add lemon juice over the top.

While, beans are baking caramelize your onions.

Caramelize Onions Ingredients:

3 large onion diced
4 Tbsp. olive oil
1 Tbsp. garlic powder
1 tsp kosher salt
1/2 cup Sherry or Marsala wine

Caramelize Onions Layer:

 Add oil to saute pan and heat well. Then add onions, sea salt, ? garlic powder and cook over medium heat for approx. 10 to 15 minutes. When well browned, add ¼ cup of Sherry wine and ?simmer for approx. 3 minutes longer to absorb the Sherry flavor.  Cool off onion mixture.

 Roasted Red Pepper Marscapone Cheese Layer

  ½ jar of roasted pepper -8 oz jar  drained
16 oz.  marscapone cheese (may substitute cream cheese)
2 Tbsp. pesto sauce
2 Tbsp. Parmesan cheese
½ tsp. garlic powder
½ tsp. salt
Add all ingredients in food processor and blend well for a minute.

Turkey/Sausage Layer

  2 Tbsp. of oil
1- lb of turkey meat or pork sausage meat
1 tsp. garlic powder
1 tsp. salt
¼ lb. red crushed pepper
½ cup Marsala wine

    Sauté meat in oil. Add meat and spices.  After all cooked, add Marsala wine and let simmer for 3 minutes. Cool off for dip.

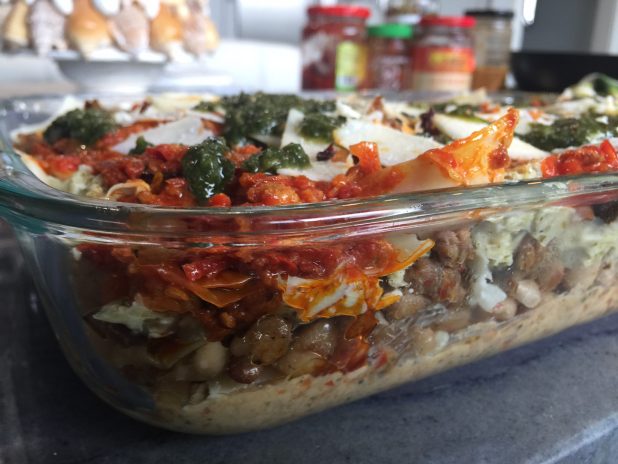
italian layered dip

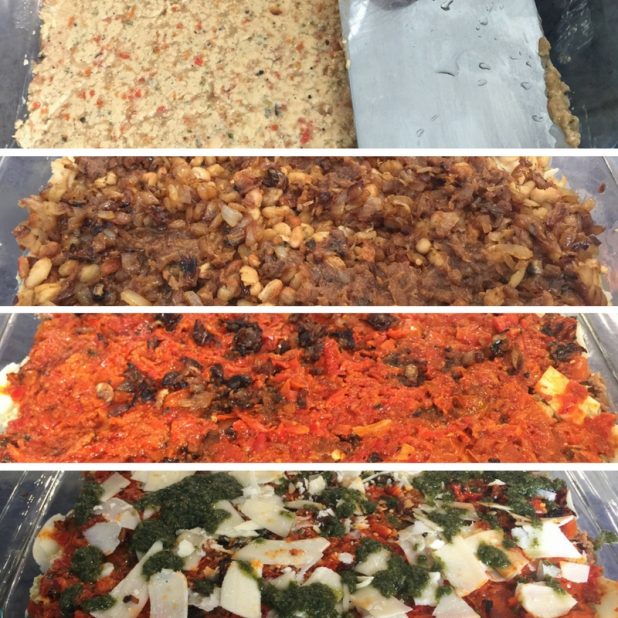
 Assemble Layers:

1st Start with layer of Red Pepper Marscapone

2nd sprinkle a layer of Parmesan / Asiago cheeses

3rd layer crispy beans

4th drizzle pesto & cheeses

5th layer carmelized onions

6th spread artichoke tapenade & sprinkle cheeses

7th layer harissa or bruschetta

  Top it off with shredded cheeses and drizzle pesto on the top.  Bake it in pre-heated oven for 25 minutes at 400 degrees.

Place in the oven 30 minutes before half time. You and your team will truly be a winner with this new famous Italian “7 layer strata tuffo.”  This is great to reheated later in the week.

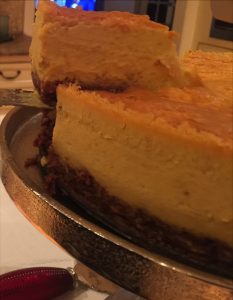
pumpkin-cheesecake

Pumpkin Mascarpone Cheesecake

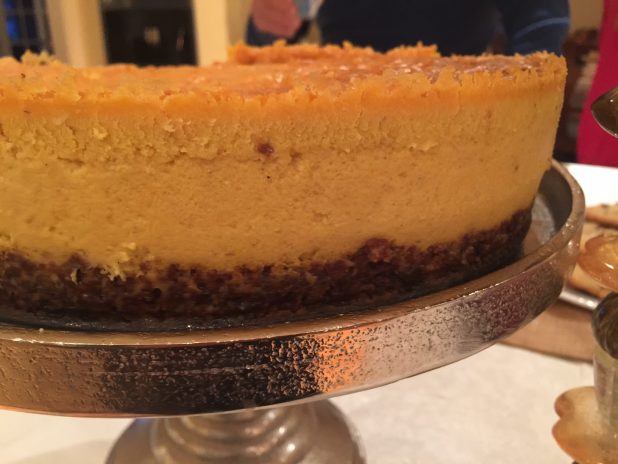
Best to make 2 days before. This is a cheesecake that gets better the longer it sets. It is a very light and silky cheesecake. It will be the hit of all holiday parties. This cheesecake does not have a strong pumpkin flavor. The flavors are very subtle.

INGREDIENTS (18)

Pan:  9  inch spring form pan

Pre heat oven to 375.

For the Crust:

  • 2 cups paleonola maple flavored  crushed fine ( gf)-granola) 1 bag
  • 1/4 teaspoon freshly grated nutmeg
  • 8 tablespoons butter melted (1 stick)
  • 1/4 teaspoon sea salt

For the Filling:

  • 2 15-ounce can pumpkin purée (not pie filling)
  • 2 cups Mascarpone cheese – room temperature
  • 1 8 oz cream cheese – room temp
  • 1 cup heavy cream – room temp
  • 1 tsp. maple cream or maple syrup
  • 2  Tbsp. cornstarch
  • 4 large eggs – room temp
  • ½ cup coconut sugar
  • ½  cup organic cane sugar
  • 1 Tbsp.  Vanilla Madagascar (preferable)
  • ¼  tsp. sea salt
  • 1 tsp. pumpkin pie spice powder
  • ½ tsp.  nutmeg
  • ½ tsp. cinnamon

Crust:

In a food processor place bag of paleonola  and blend until it resembles a coarse crumble. Add salt and melted butter. Blend in processor for another minute with additional spices.  The crumble for crust should hold together. Cover bottom of spring form pan with paleonola mixture. Bake the crust on a baking sheet until set and light brown, about 20 minutes.

Pumpkin Filling:

Tip: Most important thing to know is that all ingredients need to be at room temperature. This is to ensure cheesecake doesn’t crack.

With a hand mixer and cake mixer on low speed, blend together the pumpkin purée, pumpkin pie spice, cinnamon, nutmeg and salt and mix gently for 2 minutes, scraping down the sides and bottom of the bowl often. Add eggs in one at a time, 4 in total. In a separate bowl, combine the marscapone cheese with the cornstarch, coconut sugar and vanilla and . Blend gently for a minute then add heavy cream.  Beat at a low speed .  Add the mascarpone with the pumpkin and mix gently for 2 to 3 minutes, scraping the bowl. Make sure well incorporated.

Bake the Cheesecake:

Preheat oven to 425. Pour the pumpkin filling over the crust. Shake pan so as to get rid of any air bubbles. Wrap the bottom of the pan with aluminum foil to prevent water leakage into the pan. Place the filled cake pan in a deep baking dish and set them on the oven rack. Add enough water to the pan so that it comes up three-fourths of the way up the sides of the cake pan. Bake the cake for 15 minutes at 425 then lower the temperature to 300 for an hour or until the center of the cake is lightly set. Do not open door at anytime. Turn oven off but leave cake in oven for at least 30 minutes. Carefully remove from oven.  Remove foil when ready to serve.. Cool it to room temperature on a wire rack so air circulates under cheesecake. This will ensure crust does not crack.  Refrigerate the cake for at least 8 hours before unmolding. Best to make 2 days before. This is a cheesecake that gets better the longer it sets.


Health Benefits of Pumpkin:

Pumpkin has lots of health benefits!

Here are 5:

  1. Pumpkin seeds are very high in magnesium, containing nearly half of the recommended daily value in only a quarter cup!
  2. Pumpkin builds the immune system.
  3. Pumpkin is rich in beta-carotene.
  4. Pumpkin is rich in natural enzymes, which are great for your skin. Eat it or apply it as a nutrient dense mask!
  5. Pumpkin is has tryptophan.  Tryptophan is an essential amino acid that your body uses to make proteins, the B vitamin niacin, and neurotransmitters serotonin and melatonin. These chemicals induce relaxation and minimize stress.

Roasted Zucchini Chips

This zucchini recipe serves as a new easy “go to dish”. Plus I find it is so simple you can make this while you are getting ready for work and school.  It will be one of your new favorite vegetable dishes. Every part of this recipe is important.  The pan is the most important as it will help get the zucchini to just the right crispiness.  You can also replace this recipe as an afternoon snack. The coconut oil also satisfies that afternoon craving. I find I make this at least 3 times per week. Please enjoy. Made especially for you.

Recipe Roasted Zucchini Chips

img_0517

What you will need:

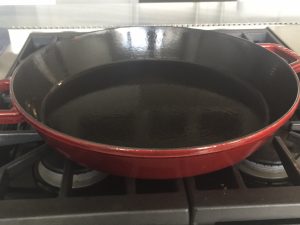
Large Roasting Pan – Iron *

   Yes, the pan is the most important part of this recipe. It will not taste the same in any other pan.

img_0514

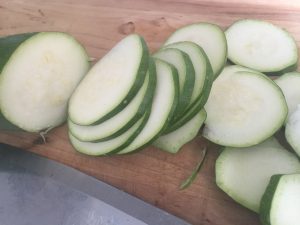
2 Zucchini – sliced 1/8 – 1/4 inch

img_0509

2 Tbsp. Organic garlic powder,

1 tsp. Sun FireSalt Salt

2Tbls. Coconut Oil

½ tsp. of tumeric*

img_0511

Directions:

Preheat oven to 450.

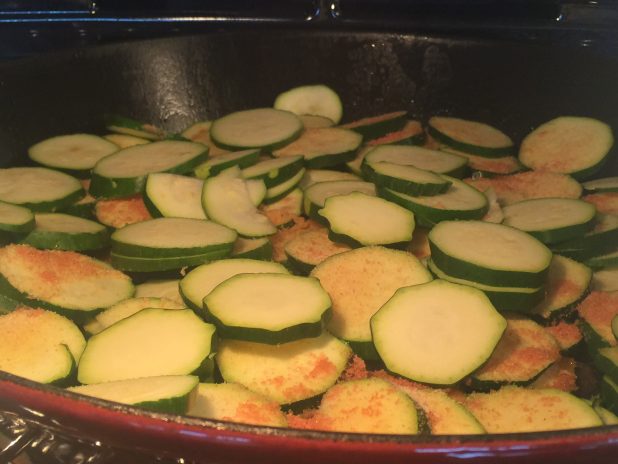
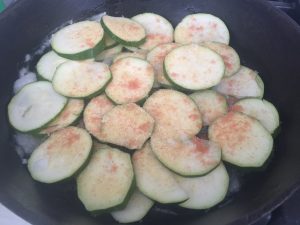
Wash and slice zucchini, approx ¼ inch.  Place iron skillet in preheated oven for 3 minutes to being the roasting process. Take pan out of oven add coconut oil to the cast iron pan first. Then add zucchini slices, in a single layer. Season with the garlic powder and salt.  Roast for 45 minutes to one hour or until zucchini is brown  and crispy almost burnt. The crispier the better it tastes.

 **After 45 minutes you may add tumeric to this recipe . And cook for another 10 to 15 minutes . Tumeric is one of the most important ingredients to prevent Alzheimer’s .

  ***If you’re in the habit of partaking of Indian and other South Asian curry dishes, you’re already doing your mental health a world of good without knowing it. That’s because evidence is piling up that one of the many health benefits of turmeric – a traditional ingredient in almost every curry dish – is that it acts to protect your brain against the ravages of Alzheimer’s disease. The yellow color of a curry (and mustard) is because of the spice turmeric, known scientifically as Curcuma longa. A “rhizome” or root known for its tough brown skin and bright orange flesh, turmeric. Read here: https://thetruthaboutcancer.com/brain-health-benefit-of-turmeric/?utm_source=email&utm_medium=social&utm_campaign=SocialWarfare

Paleonola Muffins

Paleonola Morning Muffins *Gluten Free*

These gluten free, Paleo muffins make a great breakfast on the go. They are moist and delicious with no sugar added, making them low carb. and glycemic index friendly.

Ingredients:

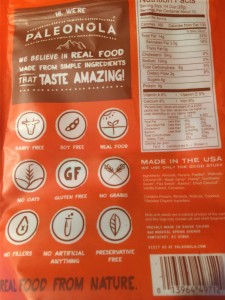
1 bag paleonola maple pancake granola -10 oz.
Approx 3 cups
1 cup pecans – chopped for topping
1 Tbps. honey

1 Tbps. Ghee melted
1 egg
½ tsp. baking soda
1 tsp. baking powder
½ tsp. vanilla
½ tsp. cinnamon
2 tsp. coconut oil*
? cup coconut milk
¼ cup hemp milk
1 Tbps. honey
2 Tbps. Almond Butter
2 Tbps. Coconut Flour
½ tsp. sea salt
1 Tbps. Maple cream preferably (may substitute maple syrup)
1 cup pecans chopped well topping

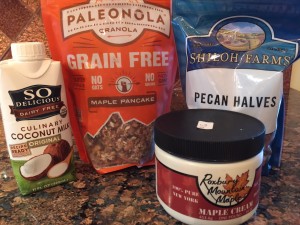
Paleonola, Pecans, Maple Cream Paleonola

Topping Ingredients:

½ cup pecans chopped well (substitute walnuts)
1 Tbsp. honey

Makes 6 to 8 muffins.

Directions:

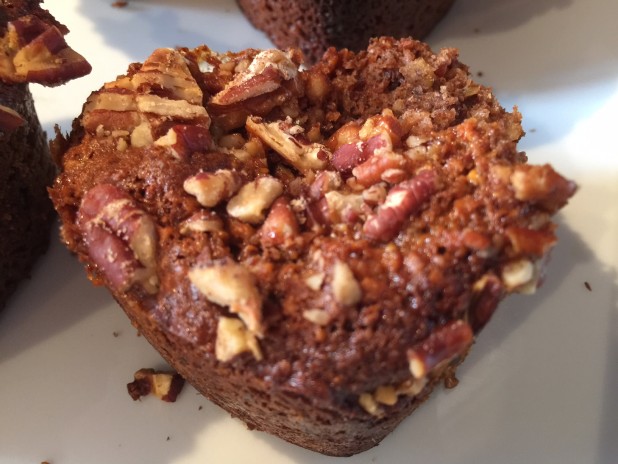
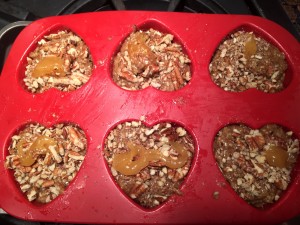
Preheat oven to 350 degrees. In a medium sauce pan, over medium-low heat melt ghee. In a food processor add all the ingredients starting with the Paleonola and including only 1 Tbsp. of the melted ghee. Using a paper towel, rub the inside of the muffin pan with the rest of the ghee from the saucepan. Spoon the muffin mixture into muffin pan ¾ way to top.  After filling the muffin pan, sprinkle the pecans on the top with a touch of honey or maple cream on top. Bake in oven for 20 minutes. After 20 minutes turn off oven and leave muffins in for 10 minutes longer.

Paleonola Muffins Gluten Sugar Free

My favorite new breakfast item. Totally gluten free. Doesn’t taste healthy but it is! In fact these muffins are very low in sugar and carbs, no one will know you did not use flour or sugar. Sweet and flavorful. Paleonola is a fantastic new item that is a great snack on it’s own.

One stop Paleo shop resource >> Purchase Paleonola
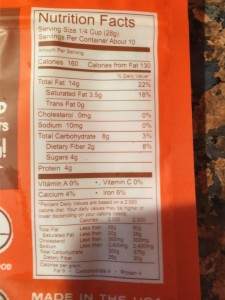
Paleonola Nutritional Facts

Roxbury Pure Maple Cream >> Purchase

Copyright: Cookingmadeizzy